Legendary English cartographer, mountaineer, and fellwalker Alfred Wainwright once said “there’s no such thing as bad weather, only unsuitable clothing.”
Mr. Wainwright, it seems, never spent many winters in Patagonia, monsoon seasons in Himachal Pradesh, nor had the pleasure of snowshoeing through a blizzard in the North Cascades. He almost certainly never made the short trip over the border to neighboring, rain-lashed, and windswept Scotland.
That said, his words contain a degree of wisdom from which all of us cold-weather wanderers can learn.
Back in the day, staying warm in the outdoors meant cocooning yourself in the biggest and bulkiest gear you could get your hands on. The results ranged from a vaguely aquatic, sauna-like stuffiness to feeling like you had been mummified in several pounds of cellophane.
Thankfully, times have changed, and our knowledge of high-performing materials and our own bodies has evolved. At the heart of this ‘evolution’ is the layering system.
In this article, we’re going to delve into the finer details of this system and give you the lowdown on how to dress for cold weather in the outdoors. It’s an easy skill to learn, and one that can make the difference between a fun, safe day out and an utterly miserable one.Before we get down to the science and skinny on layering for cold weather, let’s first take a quick look at the more standout take-homes this article will cover.
Table of Contents
Learn from the Pros – Mountaineering Legend Ed Viesturs explaining his take on the layering system.
Save for later!!! ⤵️
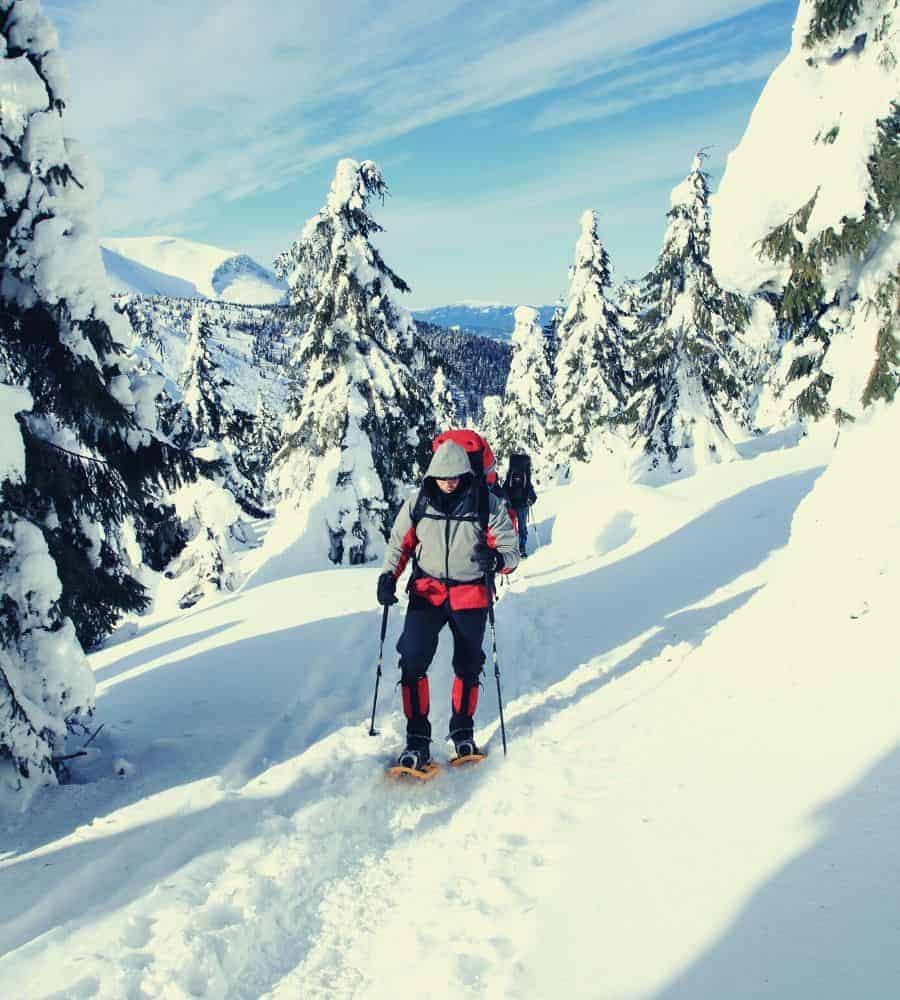
Cold-Weather Layering 101: Layering Clothing For Protection Against The Elements
To a certain extent, Alfred Wainwright’s oft-quoted aphorism has the makings of a ‘must-remember’ motto for all mountain-goers.
Whether we’re on a remote Munro in the Scottish Highlands, trekking the Annapurna Circuit, or wandering the wilds of Alaska, the weather’s vagaries and inclemencies all have one thing in common — their potential for harm and general harassment can be seriously reduced if we do our homework and know how to layer clothes for cold weather.
So, how exactly is it done?
Your Base Layer(S): Moisture Management
The most important thing to remember when choosing a base layer is that its main purpose is wicking and moisture management, not warmth. This applies to both t-shirts and long-sleeve shirts.
In a nutshell, the base layer helps to regulate body temperature by capturing perspiration and shifting (‘wicking’) it away from the body. In doing so, it assists in keeping you dry and reduces the chance of hypothermia in colder conditions by ensuring that moisture isn’t allowed to turn cold and lower your core temperature.
Base layers come in a variety of forms and fabrics. The most effective of these include:
Merino Wool
This has, in recent years, become the go-to garb for countless outdoor enthusiasts. It breathes well, retains heat even when wet, and downright refuses to stink up, no matter how hard you and your sweat glands may try. On the downside, merino products are usually very pricey and often lack the durability and ruggedness of synthetic base layers.
Synthetic Materials
Common types of synthetic base layers include Polygiene, Lifa, Omni-Wick, Capilene, Polartec Powerdry, and Polyester-Polypropylene blends. Generally speaking, most products made with these fabrics are much cheaper than merino and wick just as well. On the downside, they are much more prone to smelliness given a few hours of outdoor action, particularly Lifa and Capilene.
If that doesn’t manage to put you off cotton, maybe this article from Gizmodo (tellingly entitled ‘Why Cotton Kills’) will do the job!
Your Middle Layer: Insulation
The mid-layer is all about warmth. It works by keeping your body heat trapped close to your body and providing a ‘buffer’ against the ambient air.
The most common materials used in insulating mid-layers are down, wool, fleece, and a variety of other synthetic fabrics. Whether you choose to use one or two mid-layers will depend on how fast you’re moving and just how cold the weather is on your hike.
Down
Down is a very effective insulator in dry and cold conditions and also offers a great warmth-to-weight ratio. On the downside (no pun intended!), it’s pricey and all but useless when wet. The pros and cons of down-filled jackets and synthetic-filled jackets are covered in detail in the video below from Go Outdoors.
Water-Resistant Down
Recently, a few brands have sought to remedy down’s only drawback by creating products with improved water-resistance. These are pretty much the holy grail of mid-layer insulation, but to get your hands on one will, for most, require approaching a bank for a small loan or hitting it up for a robbery.
Wool
Wool has undergone something of a revival in outdoor clothing in recent years thanks to brands such as Icebreaker, Redram, Smartwool, and Isobaa (our favorites!). And it’s not just base layers.
Many manufacturers are now adding heavier, thicker wool items to their mid-layer collections. These layers offer the same wicking capabilities as the base layers but usually not the same wind-proofing as synthetic or down mid-layers when worn without a shell.
Fleece
‘Pile’ fleece products now come in a wide range of styles that vary from brand to brand — Polartec, Pontetorto Tecnopile, and Windstopper are just a few examples. Fleece is slightly less compressible than other mid-layer fabrics but is a cheap, reliable, high-performing option that can insulate even when wet.

Your Shell Layer: Weather Protection
The shell layer or outer layer is all about keeping meteorological miscreants — rain, wind, sleet, snow — where you’d prefer them to be…outside. That said, in order for our lower layers to perform effectively, the shell layer must also offer some degree of breathability.
Ultimately, the overall efficiency of a shell layer rests on finding a balance between weatherproofing and breathability. This point is further demonstrated in this nigh-on exhaustive analysis of shell layers from UK Climbing.
The most waterproof breathable shells use materials such as Gore-Tex, eVent, or NeoShell, all of which allow the vapor from perspiration to escape but also maintain excellent waterproofing capabilities due to their use of a membrane and a DWR-coated exterior/shell material.
A lot has been written about the difference between hardshells and softshells.
Although many softshells are now being made with hardshell-like features (improved weather-resistance, for example) and vice versa (several hardshells now sport flexible softshell inserts and boast insulating liners), the gist is this: hardshells generally offer better waterproofing and softshells offer more flexibility and better insulation.
This page from Gore-Tex analyzes the hardshell vs. softshell question in much more detail, weighing up the pros and cons of each before offering tips on deciding which one’s likely to be best for you.
Additional Gear
The bits and bobs of outdoor apparel are just as important as the nuts and bolts. Before heading out to let the elements do with you as they will, a little bit of know-how about gloves, hats, socks, boots, and shoes could save you many pains and tribulations. Choosing the right gear can make all the difference in your comfort and performance. For instance, understanding how to layer your clothing and utilizing versatile buff wearing techniques explained can help you adapt to rapidly changing weather conditions. By being prepared with the right accessories, you can enjoy your outdoor adventures without the worry of discomfort or injury.
Gloves
Depending on your activity, the type of glove you need will vary greatly:
- Hikers should always try to wear two pairs in chilly conditions: a thicker, insulated glove for warmth and a thinner liner underneath. This ensures that even when taking the outer glove off to take photos or adjust gear your skin is not exposed
- Alpinists or mountaineers should aim for something a bit more dexterous (guide or gauntlet style, for example) to allow for maneuverability with ropes and technical gear, and should also carry a second, meatier pair of fleece or down-lined gloves in case of an emergency
- Those out doing photography, hunting, snowmobiling, or fishing need to account for the amount of time they will be stationary and choose their gloves accordingly. The ideal setup would be a very thick pair of mitts with a thin liner underneath to allow for more nimble finger-work when need be
Hats
Folk wisdom and our grandmothers once told us that 45% of our body heat is lost through our heads. While that myth has now been well and truly debunked, there’s no doubt that a chilled cranium is something most of us would prefer to avoid. To do so, we’d recommend a hat that is breathable, itch-free, adequately insulated, and which covers your ears.
Merino and fleece hats or beanies are both good options and the decision is mostly a matter of personal choice. At a bare minimum take a good hiking hat for protection from the sun. In spite of the chilly temperatures, it is often quite easy to get sunburnt. Particularly if you are at higher elevations or there is a lot of snow cover.

Socks
Being one of the sweatier portions of our anatomy, our feet need to be taken care of as much as any other body part. As with other layers, the most important rule of thumb is to avoid cotton like the plague. We’d recommend merino wool socks or hybrid varieties such as those produced by Icebreaker, Bridgedale, or Wundersocks, all of which do warmth and wicking particularly well.
When hiking in frigid temps or snow, layering your socks with thin liner and a beefy wool sock is a good way to buy yourself an added degree or two of insulation.
Boots
Matching your boots to your activity is the key, as is finding a good balance between performance and warmth. Most hikers can get away with using one pair of light weight hiking boots throughout the year by doubling up their socks with a thin liner in winter.
For extreme-weather hikes or more stationary activities, however, we’d recommend a heavier winter boot with a good insulating layer to keep you warm.
Always Stay Dry
When we’re out hiking, getting cold in itself isn’t a huge problem — the real danger lies in getting wet.
Whether we get caught in a rain shower or are working up a sweat, any moisture retained by our clothing can put us at risk of hypothermia, particularly if we stop moving for any length of time. While avoiding airborne moisture is the job of our shell layers, build-ups of the bodily stuff can be reduced by following these tips:
Pace Yourself
Try to maintain a steady pace at which you are not breaking a sweat. If you start to feel a bit of leakage in the oxters or elsewhere, slow down, shed a layer quickly, or…
Use Zips And Roll Up Sleeves
If you don’t want to spend all day taking layers on and off, make use of your gear’s built-in air con delivery systems — the zips and sleeves. When buying an outer shell, consider plumping for jackets that have pit zips and adjustable cuffs and pants that have ventilation zips in the thigh.
Take Breaks
One very simple way to avoid working up a potentially dangerous sweat is to take frequent breaks. Every half hour or so, take a brief rest stop to cool down ever so slightly and then move on. These breaks should be limited to 2 or 3 minutes because if you perspire extensively in the period between breaks, as little as five minutes can be enough for hypothermia to strike.
How to Layer for Cold Weather When Doing Different Activities
A one-size-fits-all, generalized approach to layering fails to account for the specific demands of different activities. Depending on what you’re getting up to in the wild, a few tweaks and adaptations are required to optimize your layering system’s efficiency.
Below, we’ll look at how it’s done with a short guide on how to layer clothes for two broad categories of activity level: active and less active.
Active
Active sports include winter hiking, mountaineering, ski mountaineering, and cross-country skiing. In each of these activities, working up a sweat is somewhat inevitable. To ensure that sweat doesn’t ruin our day — or worse — getting your layering spot-on is vitally important.
A high-wicking base layer shirt and pair of pants or hiking leggings should form the base of any cold-weather getup.
The mid-layer and shell for more active backcountry pursuits will depend largely on the conditions. In cold, dry conditions, you can choose to wear two mid-layers up top or a single mid-layer with the outer shell.
In wetter conditions, your best bet is always to wear a single mid layer up top and the outer shell pants directly on top of the base layer if temps aren’t cold enough to warrant a mid-layer between the two.
The video below from The Outdoor Gear Review offers a general overview of layering for outdoor pursuits with most intensive activity levels as well as a handful of useful insights on optimizing your cold-weather hiking kit. Check out our guide for a fuller review on what to wear hiking.
Less Active
Less active sports include hunting, outdoor photography, fishing, snowmobiling, and ice-climbing (we’re thinking of those long periods of inactivity at belay points).
The amount of time spent stationary or nearly stationary in each of these activities means insulation takes priority over breathability and wicking capabilities. That said, the fundamentals of the layering system remain.

On top of the standard base layer (shirt and pants), these activities require a heavier mid-layer — substantial fleece-lined, synthetic, or down pants and tops. Mid-layer pants then can be topped off with an outer shell.
Up top, a second mid-layer providing added insulation is a good idea prior to finishing off the ensemble with a weather-proof outer shell, two pairs of gloves (liner and insulated), two pairs of socks (liner and a thicker pair), and a hat.
Layers for Cold-Weather Hiking…Check!
Many a hiker has asked, “why would wearing several layers of clothing keep you warmer than wearing one heavy coat or jacket?” Now that you know, it’s time to layer up and hit the trails, people!
So, how did you like our guide on how to layer clothing for cold weather? If you have any favorite cold-weather layers, let us know what they are! And if you have any other tips on how to layer clothes for winter, we’d love to hear them! Add these, and any other questions or comments in the box below.
Save for later!!! ⤵️