
At the campsite, in the backyard, and in the sunroom on a rainy day, you’ll find me whittling. I’ve been whittling off and on for going on ten years now and admit I was initially attracted to the skill because of how awesome it is.
I mean, you get a sharp knife and some wood, and you get to work and carve away until you wind up with a finished product in your hand. That’s about as simple and old-timer as it gets. You can shape decorative items like tiny flowers and designs into your walking stick, or you can focus on producing functional and practical items like knives and tent stakes.
If you like to work with your hands, you’re guaranteed to find something worthwhile when learning how to carve. It’s as good a pastime as you’re going to get, so read on and grab a knife, some wood, and let’s learn how to whittle.
Table of Contents
Whittlin’ the Day Away – Knives for Whittling
The simplicity of wood carving is a big draw. All you need is a knife, some wood, and an idea in your head to bring into being.
It’s important to start a conversation about wood carving for beginners with some attention to using the right tools for the job, and that means a good, sharp knife.
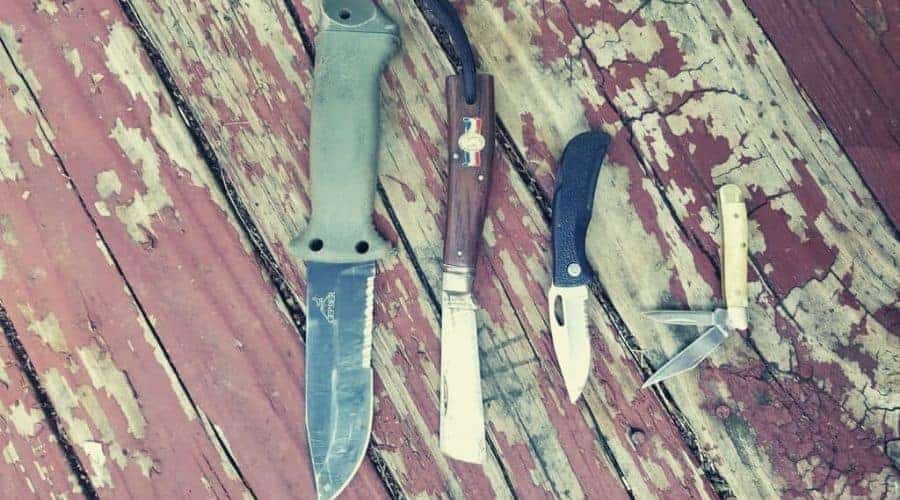
The Pocket Knife
That trustworthy knife you’ve got at your side is perfect for almost any wood-whittling need. As long as it’s sharp, it’ll cut wood; the result might not be pretty, but it’ll work.
Using your pocket knife is the ideal option because you don’t need to carry any specialized equipment. It’s one less piece of equipment to maintain and become familiar with, and it’s the one most likely to be at your side when learning how to wood carve.
On the other hand, because pocket knives tend to be general purpose, they’re less capable of performing the specific cuts some objects require. The blades of pocket knives also tend to be on the larger side for easy whittling projects, and using your trusty knife means it goes through more stress. Not a big deal, but extra use means extra maintenance!
Using more substantial camping knives can be useful for more significant projects like a fishing spear.
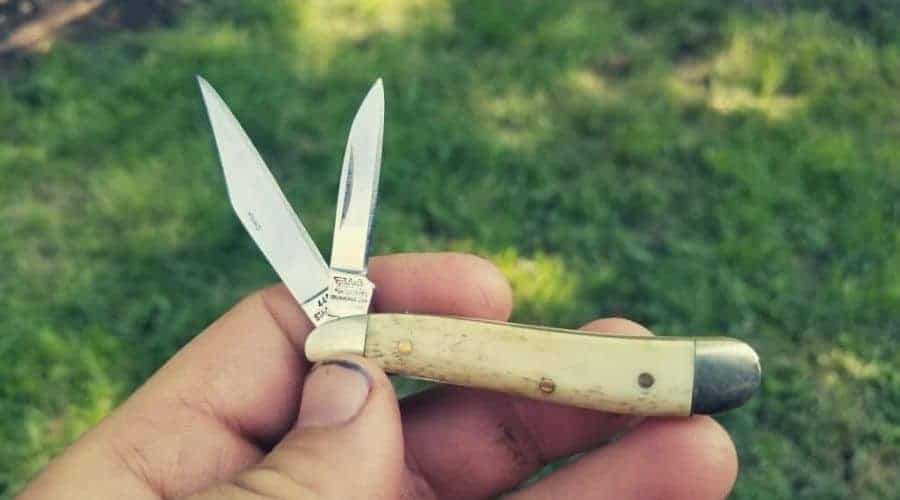
The Whittling Knife
Designed and purposed for one task, the whittling knife is typically a very sharp tool used for a variety of different cuts. Most knives in this category will have multiple blades for different uses and feature a handle that’s comfortable to grip in a variety of methods.
Using one of these bad boys when practicing how to carve is beneficial because you’ve got multiple blades for different purposes at your immediate use. Because the knife is designed for this one task, you’ll only use it when whittling, and that translates to less wear and tear on your main blade.
On the other hand, it’s another piece of gear to carry and maintain. Its limited uses are because of the focused purpose of the tool; focus is proper when you have one task at hand, but that also makes the knife a niche tool in your bag.
Keep Your Knife Sharp
What good is a knife if it has an edge good for slicing butter but nothing else? Sharpening your blade is of vital importance to a functional tool.
But sharpening knives for many people is a taboo action. Isn’t this an exact science demanding precision?! Well, it is and it isn’t.
During the day I use a pair of Felco F-2 pruners extensively (they’re a solid purchase to make, whether you’re a gardener or not!), and I keep those babies as sharp as I can. I’ve learned a thing or two about what works when sharpening a blade you’re going to use in any weather condition.
Use the Right Stone
In the toolshed, we use this Multi-Sharp tool for our pruners. Our pruners demand a precise edge that can be sharpened easily and quickly, and this tool is fool-proof. Just lock the sharpening tool onto your knife blade and attach the stone at one of the pre-designated angles.
That’s great for a lot of people, but I’ve been sharpening blades since I was a very young man. I need to use something that allows for maximum freedom and precision. A traditional whetstone is the tool for the job, like this one here.
Using a stone like this requires some practice to get it right, but when you’ve got it down, you’ll be happy you spent time practicing. Your blade’s edge will be sharp and clean, and you’ll have that dash of pride knowing you did something the old-fashioned way.
A Dab of Oil
Oh, boy! This is an area of much contention and a million different opinions. I’m going to detail what I’ve found works for me, and it works quite well.
When sharpening a blade I apply a dab of regular motor oil to the blade itself, not the stone, and draw the stone in a smooth pull over the edge of the blade. Using machine oil or 3-in-One oil is another option, but simple water works as well.
What the liquid is isn’t important; the function of the liquid is to reduce friction and to carry away bits of debris that hamper sharpening.
How to Sharpen
I love the use of a two-sided whetstone like the one I mentioned above because of its simplicity and ease of use. Using specialty tools works well, but they lack the fine-tuning a simple whetstone offers.
A few quick swipes of your knife blade held at about a 45-degree angle on each side is all it takes to sharpen a knife. The sharpening process can seem incredibly challenging, but the mystique of it all minimizes after a bit of practice.
Every knife blade is different and might require a slightly different angle to sharpen, but the process remains the same.
The Best Wood for Whittling
What kind of wood is best for whittling? That’s a matter of some debate, but a few clear choices stand out as superlative. But before we look at the types of wood to practice with when learning beginner wood carving, there are other keynotes to learn about first.
Dried Wood versus Green Wood
Chances are most of your whittling will be done on green, or uncured/fresh wood. The moisture content is higher in green wood and makes it much easier to work with than dried wood. It’s also far more readily available than specially dried wood, especially when you’re in the field.
As a disadvantage, most green woods are too soft and won’t stand up to abuse for long. But you can add much more detail to green wood carvings if you want a level of that type of ornamentation.
Dried woods are much more challenging to work with but produce material that is ready to go for some harder jobs. It’s also more difficult to find in the field and is a project to work on when you can procure the materials from a reputable source.
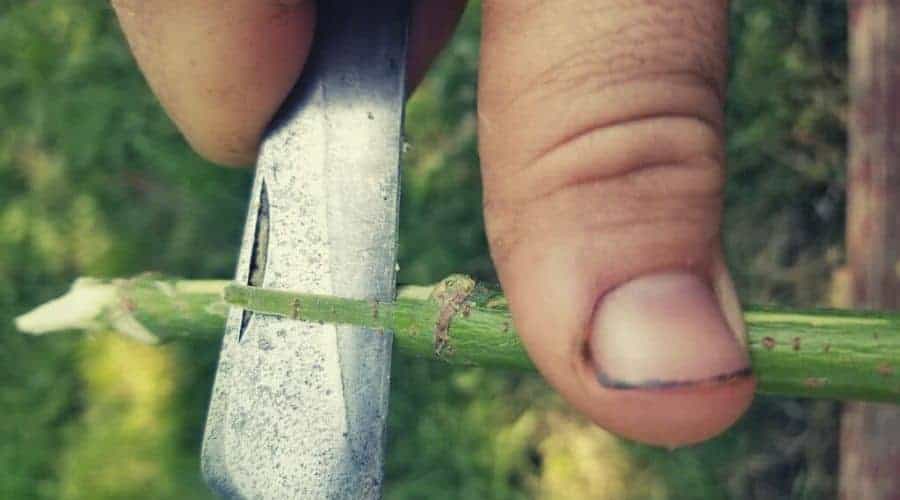
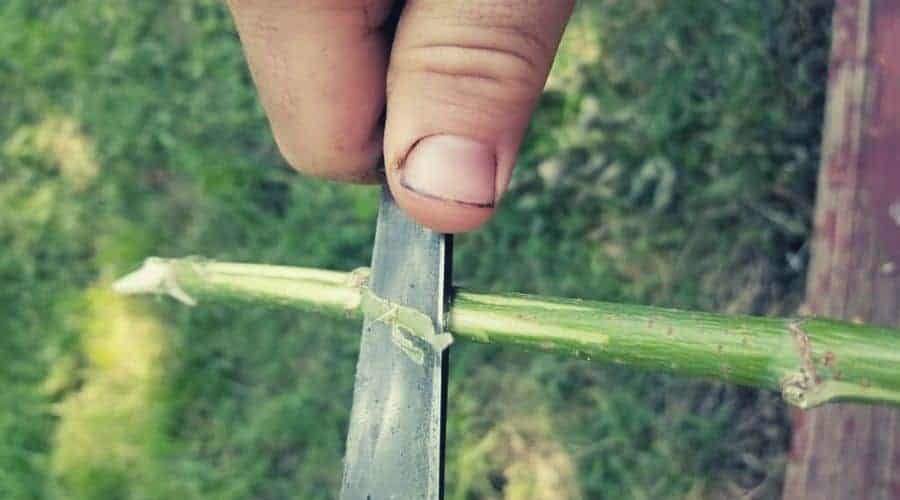
Go with the Grain
The best woods for whittling are the ones with a straight grain. Anything else is just too complicated to work with and usually results in unattractive products and handfuls of splinters. Watch out for knots, also; they can be a significant pain to work with.
Find lengths of wood that are straight, with the fewest branches possible. More extensive projects like a bow need to be whittled from the best material to prevent them from snapping during use.
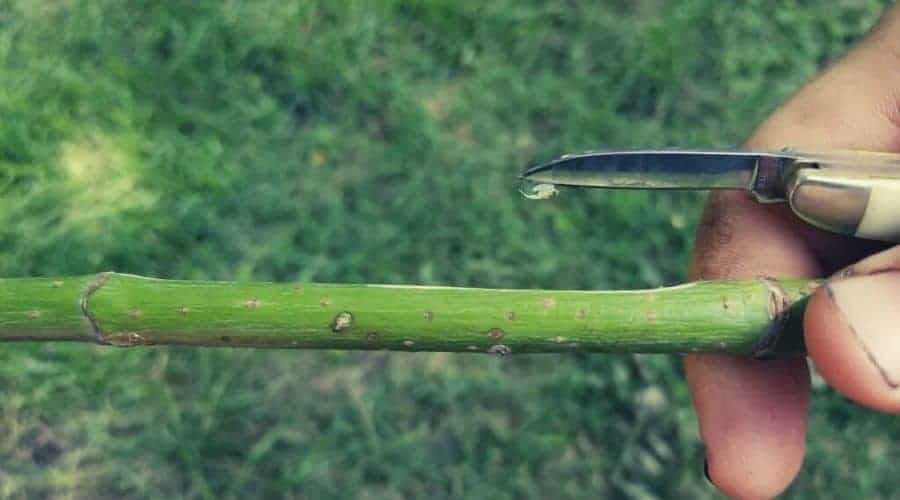
Cuts that are made going with the grain will cleave off smoothly, and if you have soft wood and a sharp knife, it’ll look like a delicate ribbon of butter. But cuts made against the grain result in splits and breaks and way too many headaches. Sometimes you’ll need to cut against the grain, and that’s okay, but the majority of your project should be done with cuts going with the grain.
Types of Wood to Use
There are plenty of options out there, but these listed here are easy to work with and readily found.
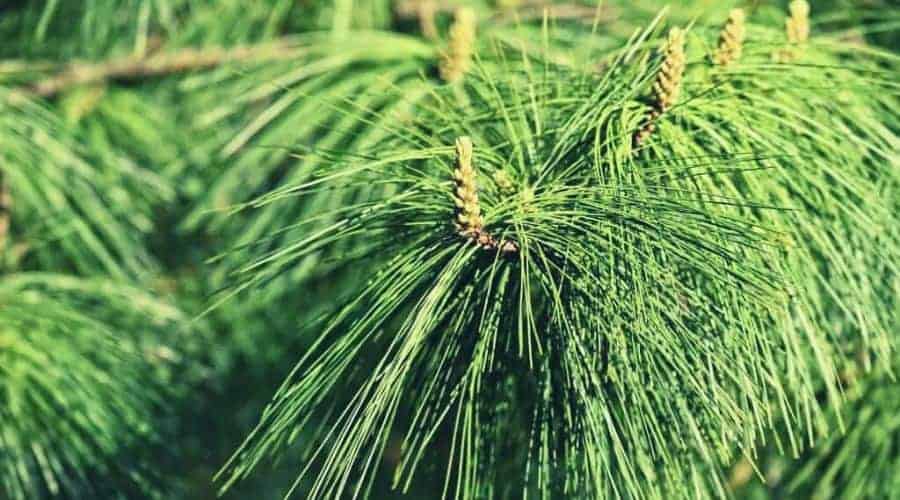
Pine
A trusty and reliable wood to whittle, pine is also cheap and soft. It’s an easy tree to identify when in the field, too, but beware of dripping sap from a fresh pine branch. Do yourself a favor and use the dying, dry branches of pine for your whittling project.
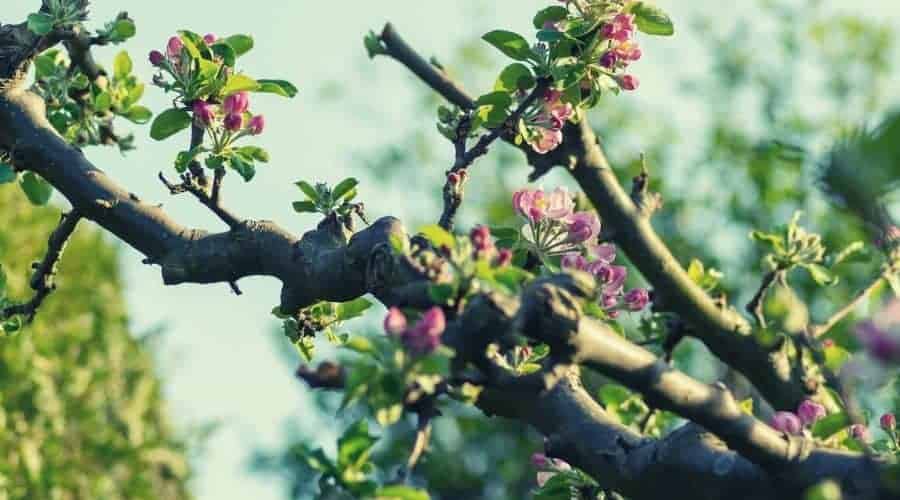
Apple/Cherry
A wood with plenty of moisture and a delightful smell. This material is excellent for making cutlery and bowls. These trees are easily found growing on the borders of forests; they are easy to work with and their tendency to send out “whips” and water shoots means there’s plenty of great material to be found.
Ash
A common tree spotted in the field, the ash tree has a relatively straight grain and is pretty dry even when it’s freshly harvested. That makes it ideal for heavy-duty projects tent stakes and knives.

Balsa
Remember those cheap airplanes we got as kids, the ones where you insert the wing through the body and toss ‘em into the air? They were made of balsa wood, a light, soft, and flexible wood. That makes it great for whittling, especially when you’re starting out. You can buy chunks of it for next to nothing
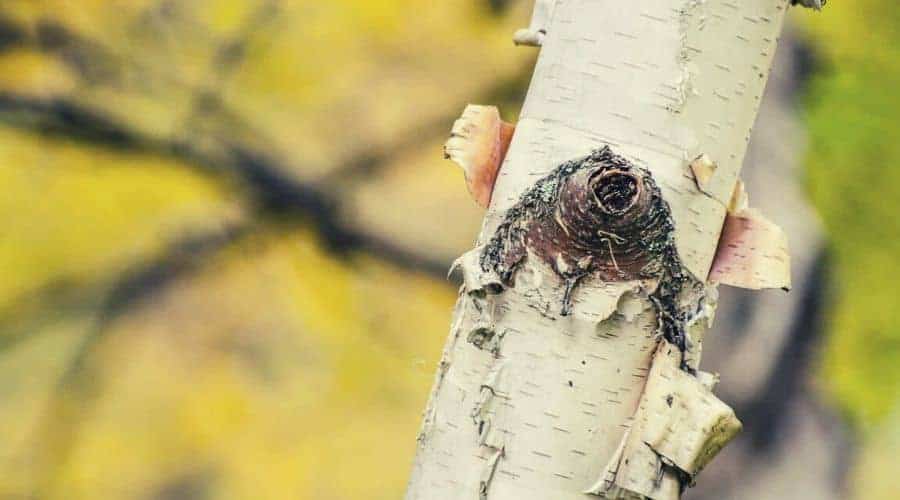
Birch
My personal favorite, birch is readily found in most areas, it is soft and pleasant to work with, and it drops branches and limbs readily so you don’t need to kill a tree to get some material. It’s easy to work with when it is green or dried, so you really can’t go wrong with this wood when learning the ropes. As a bonus, its bark is an excellent fire starter.
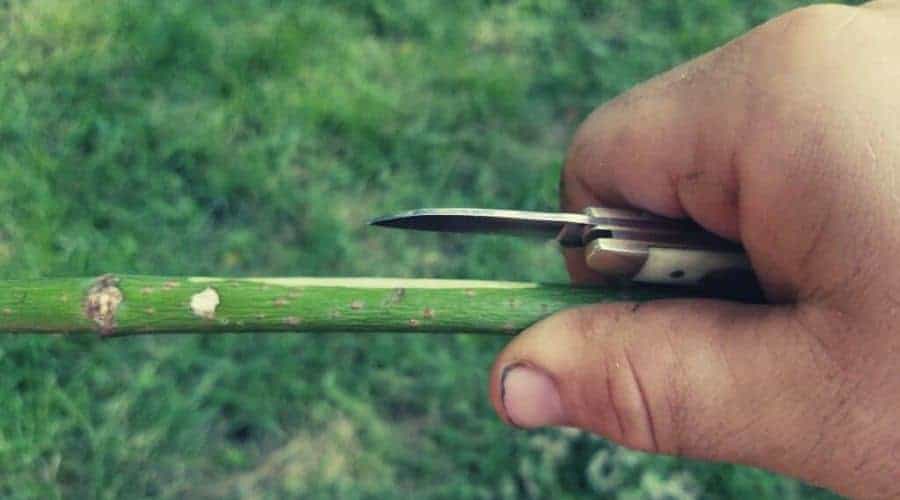
Whittle a Stick or Branches
As long as it isn’t a hunk of something poisonous or pokey, just about any piece of wood can theoretically be whittled. Remember that you’re looking for something easy to work with, with a straight grain and as few knots as possible.
For a more detailed look at finding the correct green wood, check out this awesome resource for harvesting wood.
Woodworking Safety
For any project where you’ll use a sharp knife, some safety protocols need to be addressed.
Ouch! That Smarts!
If you injure yourself while whittling, it’s almost definitely going to be with the knife blade. Whatever the cause (an inept or careless hand or maybe a straight-up accident), an accidental slice to your skin can be a big problem.
I’m in a career where I cut my hands almost daily, usually because of exhaustion or carelessness. Focus on the object you are whittling and don’t carve at random. Plenty of pictures litter the internet of guys smiling all carefree around a fire while they have a knife in one hand and a stick in the other, whittling away without looking at what they’re doing.
Not only are they going to wind up with a butchered project, they’re also likely to cut themselves up because they aren’t paying attention.
That’s the biggest safety tip you get when learning whittling; pay attention to the project at hand.
Use Protection
Splinters smart, and a good pair of gloves that allows your hands to move freely while providing protection is an excellent investment. A single errant swipe of the blade can make you wish you put on that leather glove.
Gloves aren’t your thing? Me neither, but you can bet I wear them when I need to.
Another piece of advice is to try wrapping a piece of duct tape around your knife-hand thumb to function as a sort of thimble. It’s a good idea if you can’t do gloves!
But for me, the best safety practices are in proper technique.
Technique: Types of Whittling Cuts
You’ll utilize three primary cuts when whittling, but pay attention to the pressure you’re using and the force being applied.
You aren’t carving a turkey (unless it’s a wooden turkey) and you aren’t pouring all of your strength into each swipe of the blade. Whittling is a hobby of precision, patience, and “tension”; that is, you feel the cut you’re making and only give it so much oomph.
A close comparison would be pulling out a weed from the garden. If you grab it and yank, you’ll pop the stem off and leave the roots behind. But if you hold onto that weed and slowly pull, you can literally feel the roots releasing from the soil and then popping out all in one piece.
Most common sense and knife safety infomercials will tell you to never cut toward yourself. But in whittling, most cuts are down toward you! There’s no way to understate that this is potentially a dangerous hobby, so your attention and caution are utterly necessary.
You aren’t in a race when wood carving. You’re taking your time to produce something, so use patience when you’re cutting, and don’t try to force your way through it.
I Don’t Know What to Do With My Hands
Hold the knife in your dominant hand and the wood in your opposite hand. You need all the dexterity you can get!
The Straightaway Rough Cut
Ever hear the quote from Michelangelo (the artist, not the turtle) about how he carved his statues? He said, “It is easy. You just chip away the stone that doesn’t look like David.”
That’s the approach you have when straightaway rough cutting. Make long, thin slices to the wood. Your goal is to create a rough shape of the object your whittling.
Don’t slice down and into the wood or it could crack. You’re carving thin slices and chips off to reveal the shape of your project.

The Pull Stroke
Also known as the paring cut because it’s just like paring an apple or potato.
You’ll hold the wood in one hand and make small, shortcuts with your knife facing towards you. Your knife hand’s thumb is braced against the wood to allow maximum precision and control of your cuts (this is where that improvised thumb pad comes in handy if you slip).
The trick here is to squeeze your fingers on the knife hand, slowly and with the right amount of tension. Feel the blade sliding through the grain and you’ll start relaxing over how darn meditative whittling is.
The Push Stroke
This is the jackhammer of your whittling repertoire.
When using the push stroke, place your thumb against the back of the knife blade and push through those stiff and uncooperative areas where the pull stroke is ineffective. Again, you’re not trying to hack off chunks at a time. Feel the knife working and you can tell when the wood is about to yield.
How to Whittle: Beginner Projects
We’ve got a few useful ideas on what to whittle that are fun to put together. Whittling embraces creativity, but start with some of these until you have a foundation to build from. These projects below are also helpful around the campsite and in the wild, so that’s a big plus too.
The Tent Stake
The best project for learning, putting together a tent stake is an easy task that teaches you knife control.
The Fishing Spear
Not for the catch-and-release fisherman, this fishing spear is a nice project for an extended stay in the field.
Knife
The tried-and-true wooden knife is a must. It can be a bit tricky at times but is a straightforward project.
Bow and Arrow
The ultimate whittling craft, carving a bow and its arrows is a lengthy process that demands your attention for this challenging project.
Spoon
If you forgot your spoon, it’s no problem; just exercise the utmost caution when whittling the spoon.
Whittling Gear & Resources
Suggested Knives
A sharp blade is vital, so consider picking up one of these knives for when you’re learning.
Swiss Army Pocket Knife
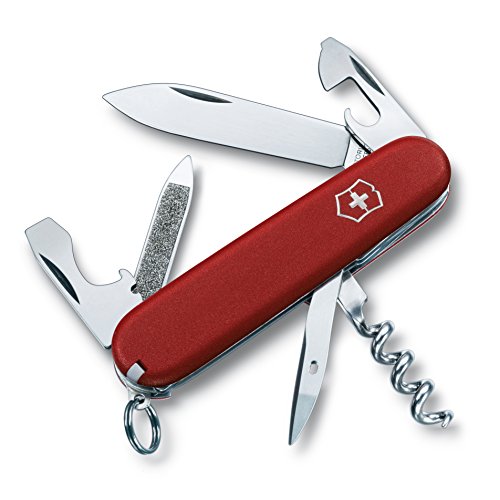
When it comes to multi-purpose, the Swiss Army Pocket Knife has got the lion’s share of the market. While some of the higher-end models have tools you didn’t even know existed all conveniently crammed together into one unit, the Camper versions are a more lightweight alternative.
This camper model features two blades perfect for practicing whittling, but sports a handful of other features that could be helpful; the corkscrew and saw come to mind as helpful for whittling.
My only complaint with the Swiss Army Knife model is that it needs to fit in my pocket like a lumpy little thing. I prefer knives with a pocket clip that be quickly put to use; the compact design of the Swiss Army Knife is one of its best features, but it’s simply not a feature for me.
Morakniv 106
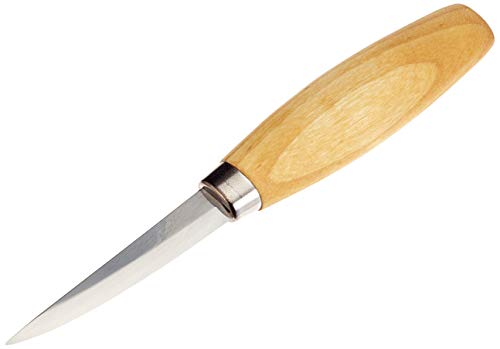
A specialized knife for whittling and woodcarving, the Morakniv 106 is a serious bargain for its price. The blade is sharp and has a consistent narrowing of the blade for fine-tuning your cuts.
Although it’s a specialized knife for woodwork, it can serve other functions with great skill. Some reviewers have used it as a hunting knife for skinning animals, while others have had great success utilizing the Morakniv as an all-purpose knife around the campsite.
The only consistent complaints are the symmetrical handle and the blade’s tendency to rust easily. Although the handle feels great in your hand, you’ve got to double-check that the blade is facing away from your thumb every time you pick it up. The rust-prone blade is a minor annoyance that can be solved with a regular coat of oil or beeswax, but these materials can be hard to find in the field.
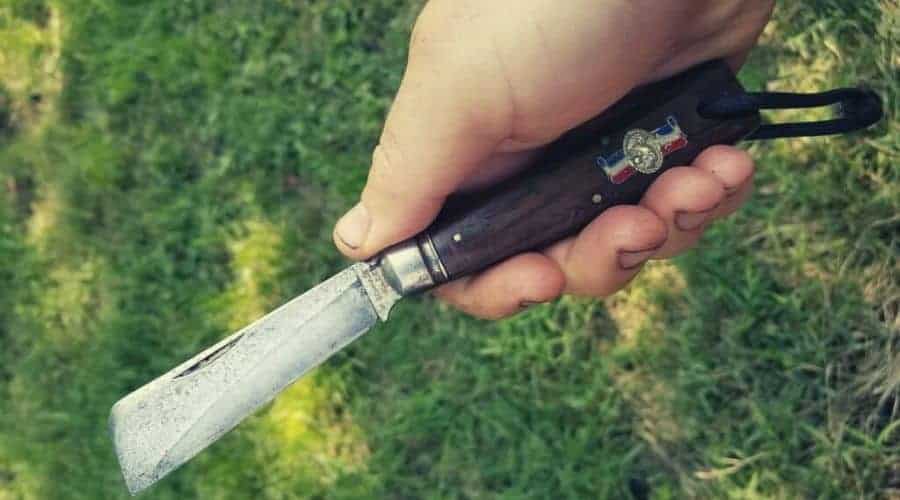
Opinel Carbon Blade N08
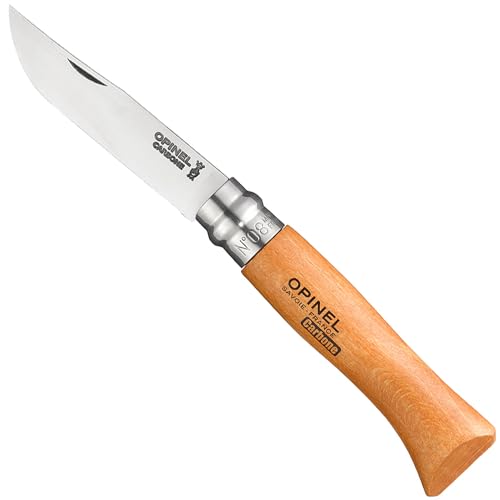
I’ve got a lot of love for the Opinel Carbon Blade N08. It’s a blade that ignores any flash and flair and provides some beautiful function. It’s a general-purpose knife, but perfect for whittling with its no-nonsense blade and flat grind.
This is a pretty big knife! The rest of the knives here are typical pocket-knife size, but this sucker is huge in comparison. That allows for it to serve a range of purposes beyond whittling.
The folding blade is a little bit different than most Americans expect, and the metal is prone to rusting without regular care. By “regular care” I mean wiping the blade after each use so moisture doesn’t collect on it. Simple enough!
Flexcut Whittlin’ Jack
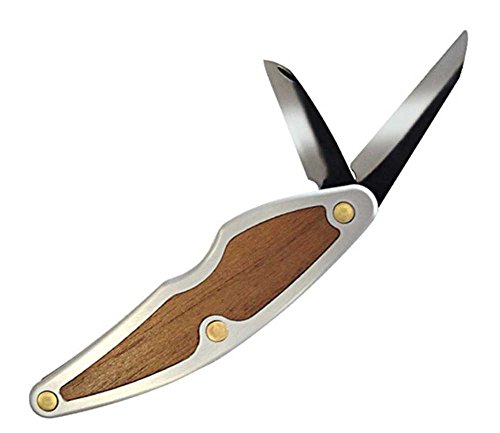
A pocket knife with a sweet name and a design that sings simplicity, the Flexcut Whittlin’ Jack is great for both lifelong wood carvers and those learning the ropes. The handle is a dream to hold and the two simple, sharp blades pack a wallop on wood.
It’s not the most attractive knife in the world but it gets the job done, and then some. The biggest issue is that the blades are held in place rather stiffly, so opening them can become a safety issue. Some reviewers use needlenose pliers to pull the very sharp blade out safely, but with regular use, the blades become easier to open.
The blades are very strong and sharp, but they DO NOT need to be sharpened with a regular stone as we mentioned earlier. A quick stropping with the back of an old belt will do the trick to keep these blades sharp as can be.
Protective Gear
A good pair of gloves is helpful when practicing. Some pairs are designed to be resistant specifically to knife blades, like this Wells Lamont pair. When I worked in a restaurant we used WISLIFE Cut Resistant Gloves as a rule; they allowed fine control of food products and provided ample protection from cuts and abrasions.
For an all-purpose glove, I love the Bellingham Nitrile Dipped Gloves. I use them every day at my job and can’t be happier with their performance. They provided protection from glass, blades, rocks, and splinters. The only hang-up is that if you cut through them, it’s time to buy a new pair of gloves.
Earlier we talked about leather thumb guards. These aren’t quite my cup of tea, but their function and performance are remarkable. This one by Treeline is about the best you’ll find on the market, and it’s cheap enough that you could buy backups and extras.
Books
Sometimes you need a hard copy to reference when learning, or you want to have extra project ideas. If you’re like me then the thought of referencing your phone while camping is a sin, so carrying a copy of a book with projects and references is ideal for learning the skills in the field.
- Whittling Twigs and Branches: A perfect book for when you’re practicing some of the smaller, finer projects around the campfire.
- The Little Book of Whittling: Don’t let the name fool you because this book is packed and loaded with whittling ideas and tips from an author with over 40 years of whittling experience.
- The Whittling Handbook: A nice reference book for your projects, perfect for keeping handy when you’ve got a few minutes to read up on the subject.
